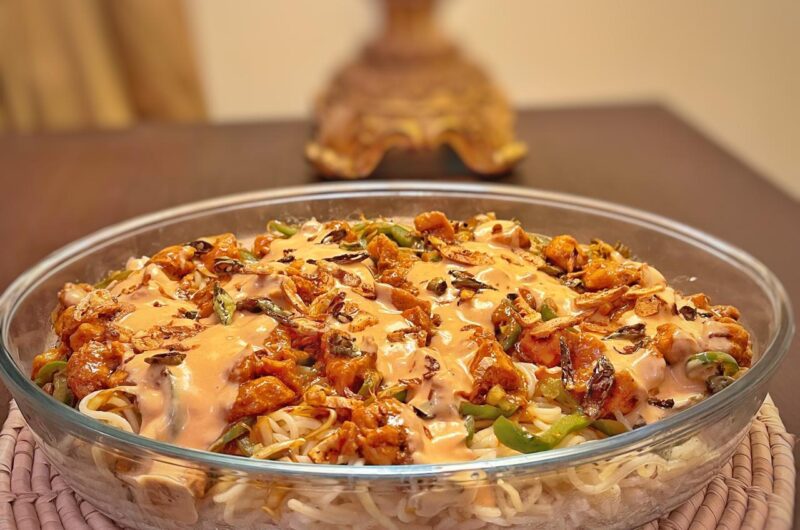
Singapore Rice is not actually a dish from Singapore, but rather a fusion dish that originated in Karachi, Pakistan.
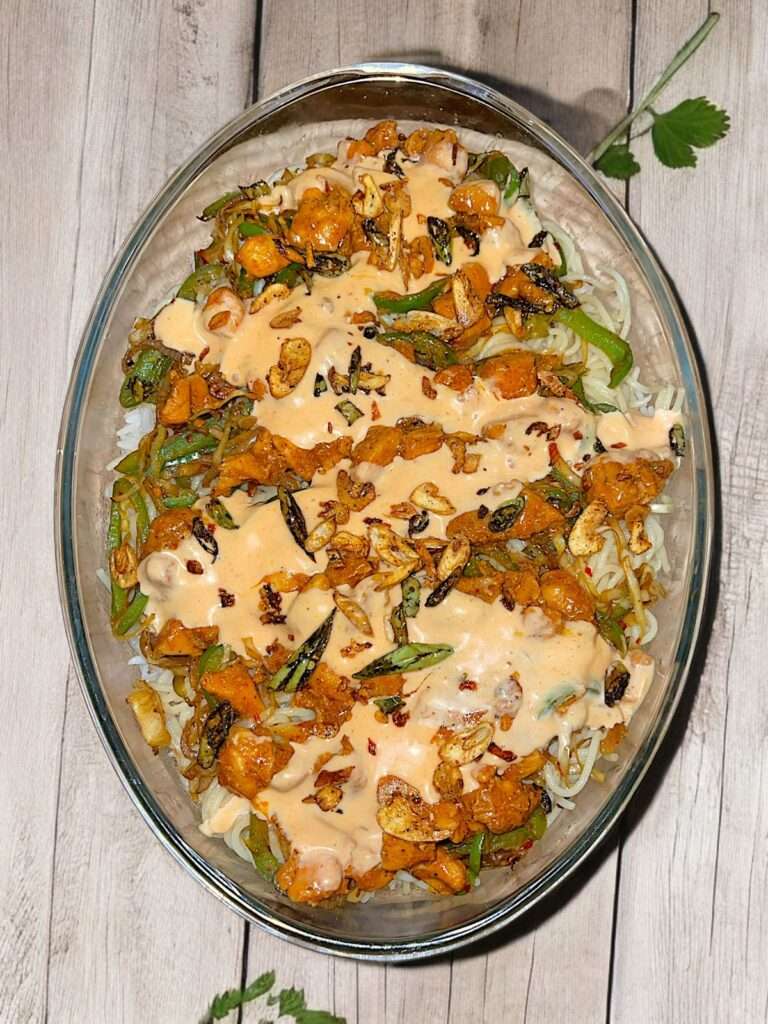
The dish consists of several layers, a base of seasoned basmati rice, followed by a layer of stir-fried noodles, then a layer of chicken cooked with spices in an Indo-Chinese style, stir-fried veggies and finally topped with a special sauce and a tadka of fried garlic and green chillies.
Origin Of This Recipe
Despite the name, Singapore Rice has no connection to Singaporean cuisine. It seems the dish was created by a Pakistani wedding caterer who wanted to make a one-dish meal similar to biryani, but with the added elements of noodles and sauces, giving it more Desi flavor. To make it sound more fantastic, they gave it the name “Singapore Rice.”
The dish became popular in Pakistan, especially in the city of Karachi, and over time different versions have emerged at restaurants, homes, and cafes, each with their own unique twists. But the core components that are rice, noodles, chicken, and the spicy mayo sauce remain the same.
While it may seem like an unusual combination of ingredients, Singapore Rice is considered a delicious Pakistani fusion dish that combines flavors from Chinese, Indian, and local Pakistani cuisines. It’s a hearty, flavorful, and visually appealing meal.
Similar fusion recipes
Chicken Manchurian
Chicken Jalfrezi
Step-By-Step Process Of Making Singapore Rice
- First, marinate the chicken with salt, chili powder, chili flakes, coriander powder, vinegar, and ginger-garlic paste. Let it sit for at least 30 minutes before cooking. You can also leave it overnight for better flavor.
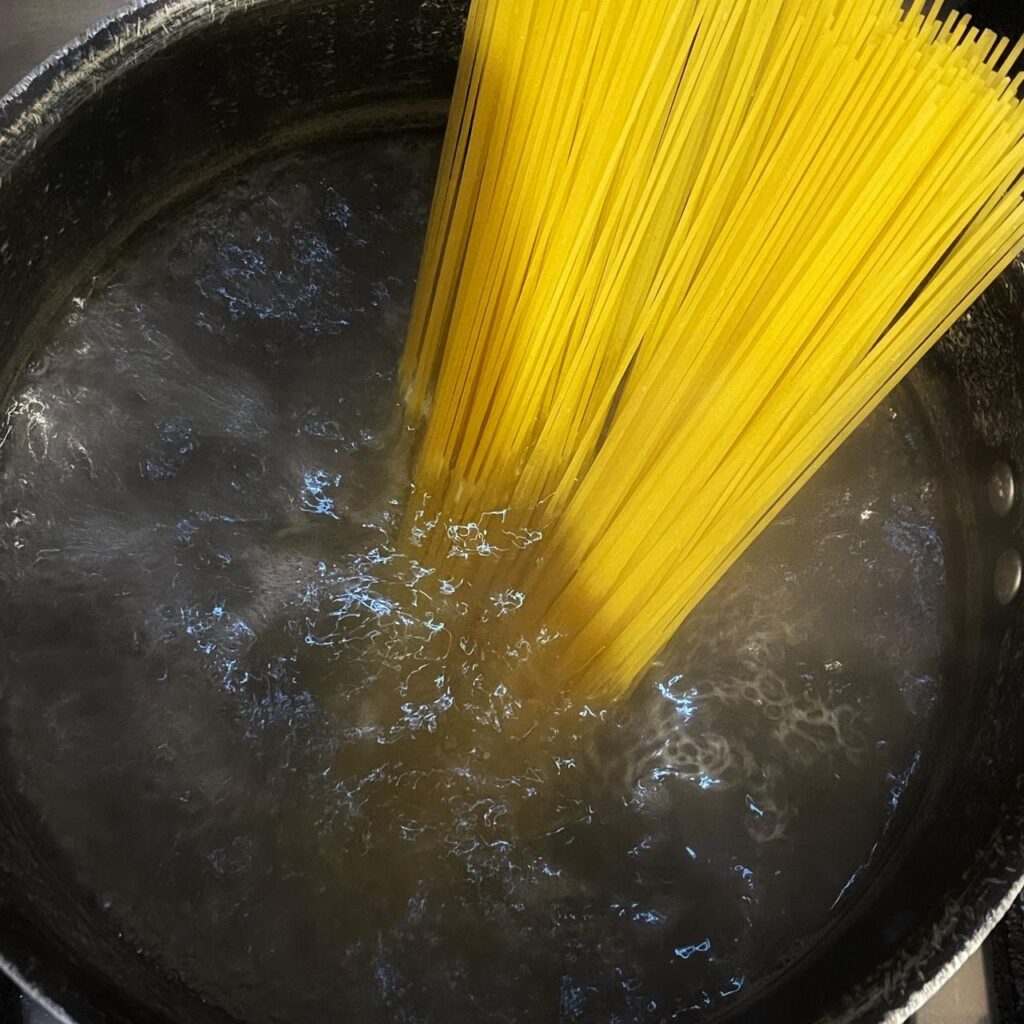
- Begin by separately boiling rice and noodles in salted water until they are cooked but still al dente. Drain the water, set them aside, and allow them to cool for later assembly.
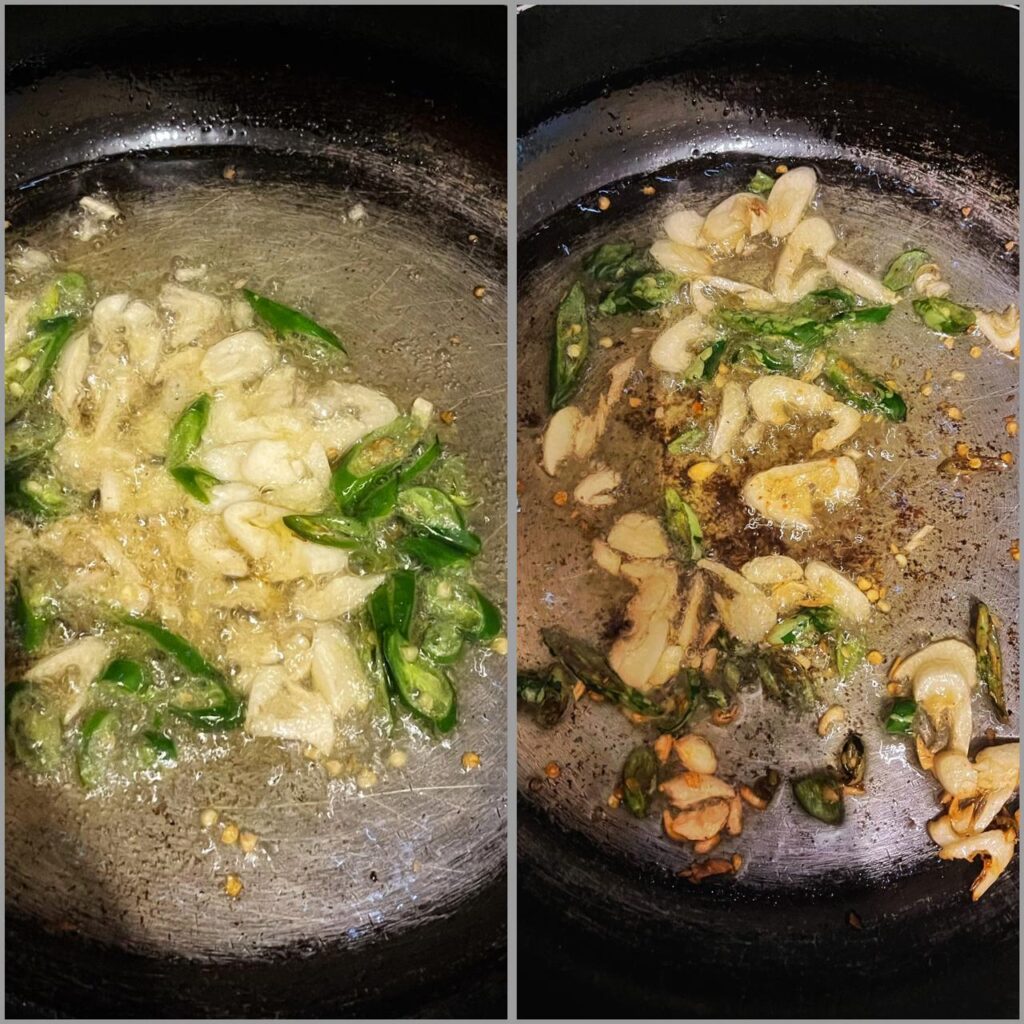
- Prepare tadka: Heat oil in a pan over medium flame and sauté sliced garlic and green chilies until they turn beautifully brown. Remove them from the pan.
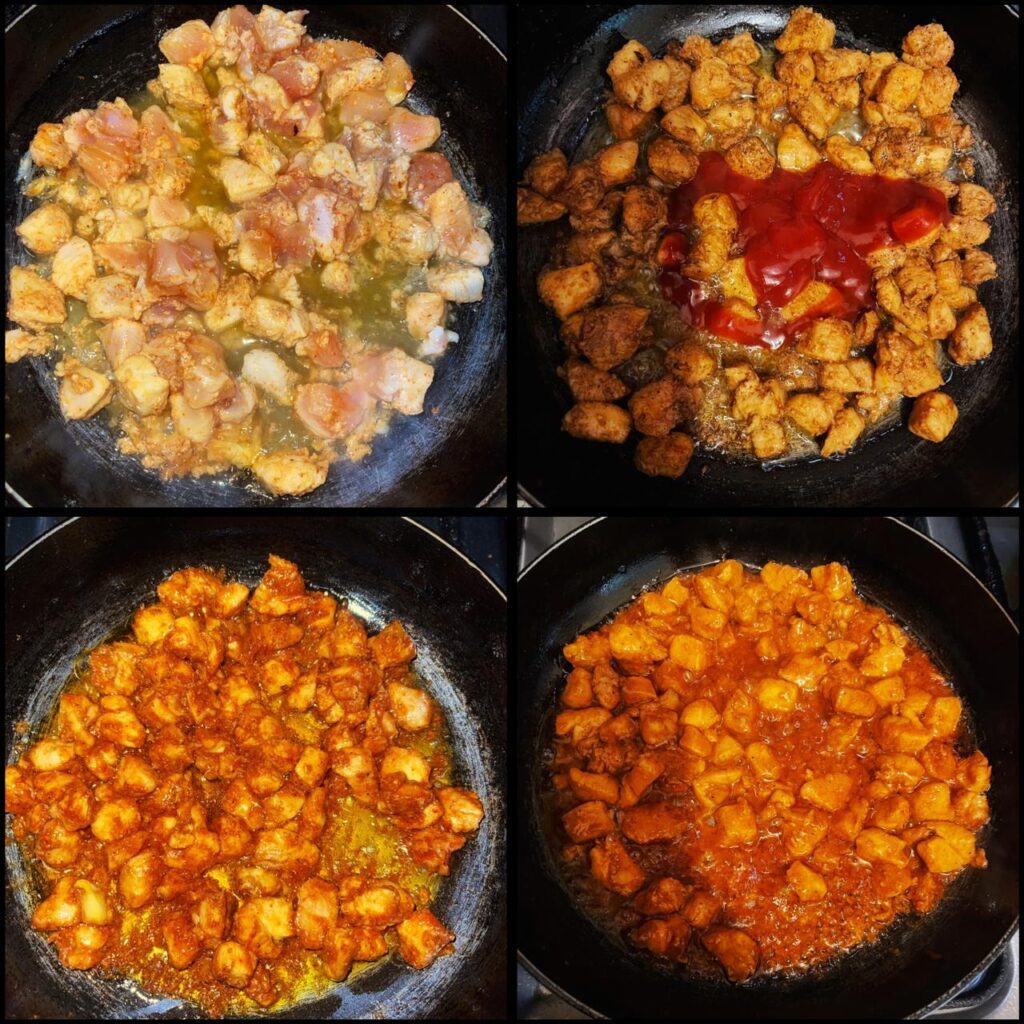
- Cook Chicken: In the same pan, cook marinated chicken until it changes color. Add 1/4 cup water, cover the pan, and let the chicken cook for 5-7 minutes. Once cooked, sprinkle black pepper powder and soy sauce. When oil starts separating, add ketchup to the chicken and set the pan aside.
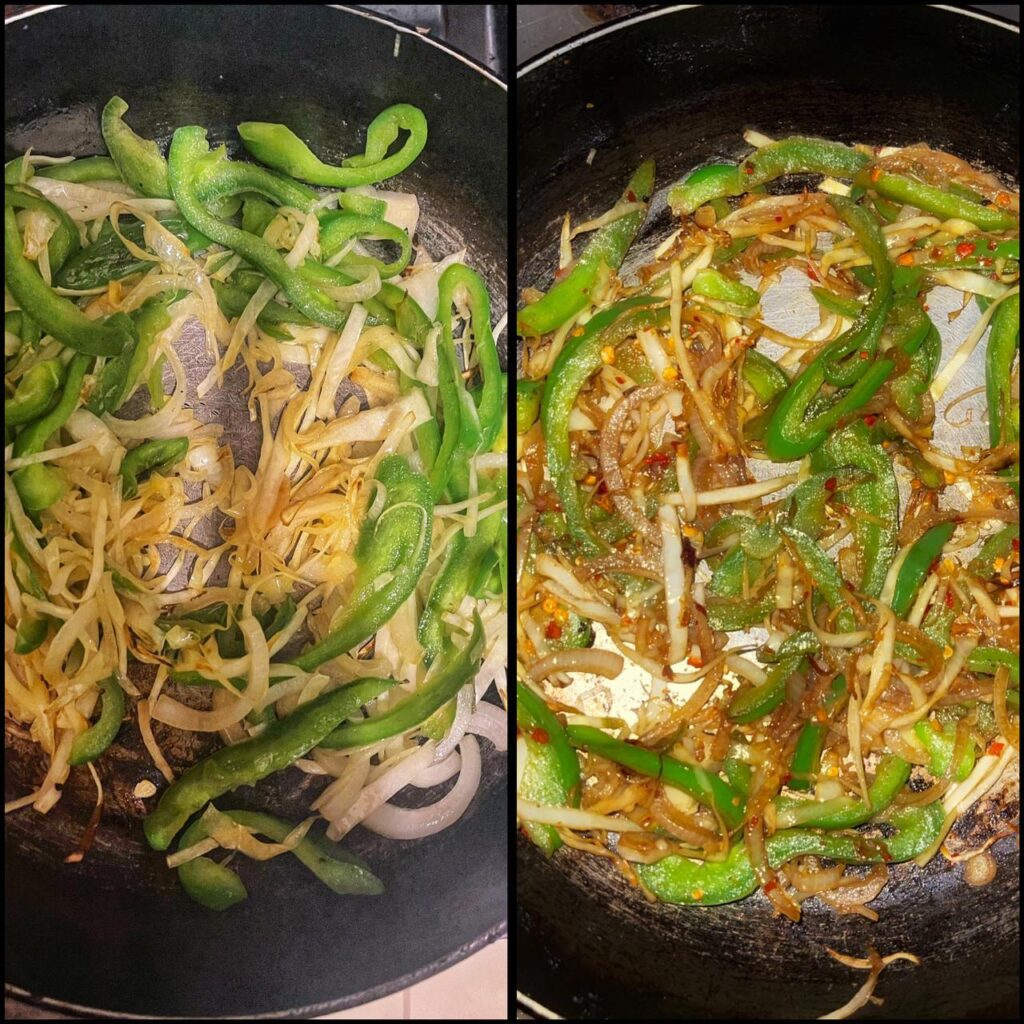
- Sautee veggies: In a separate pan, heat a bit of oil and stir-fry veggies with soy sauce and chili flakes. Be sure to fry quickly to retain the crunchiness of the vegetables without overcooking.
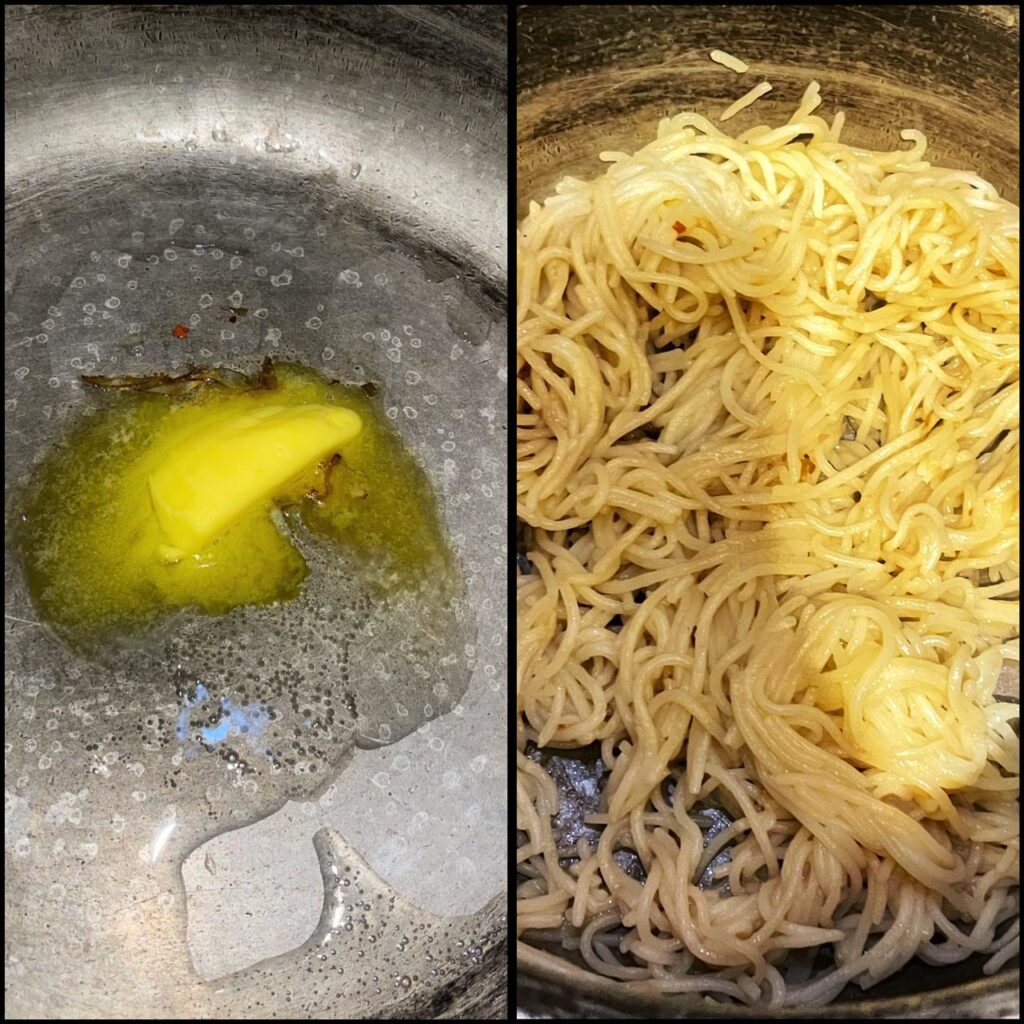
- Stir-fry Noodles: In another pan, melt butter and add soy sauce to stir-fry the boiled noodles, ensuring they are well-coated with the sauce for added richness and flavor.
- Next prepare garlic rice: Heat oil in a pan, sauté chopped garlic until fragrant, and then add the cooked rice. Mix well to infuse the rice with garlic flavors. Set the seasoned rice aside for assembly.

- Prepare sauce: Combine mayonnaise, ketchup, siracha, mustard sauce, garlic powder, and chili flakes in a bowl. Mix the ingredients thoroughly to create spicy sauce that will elevate the dish.

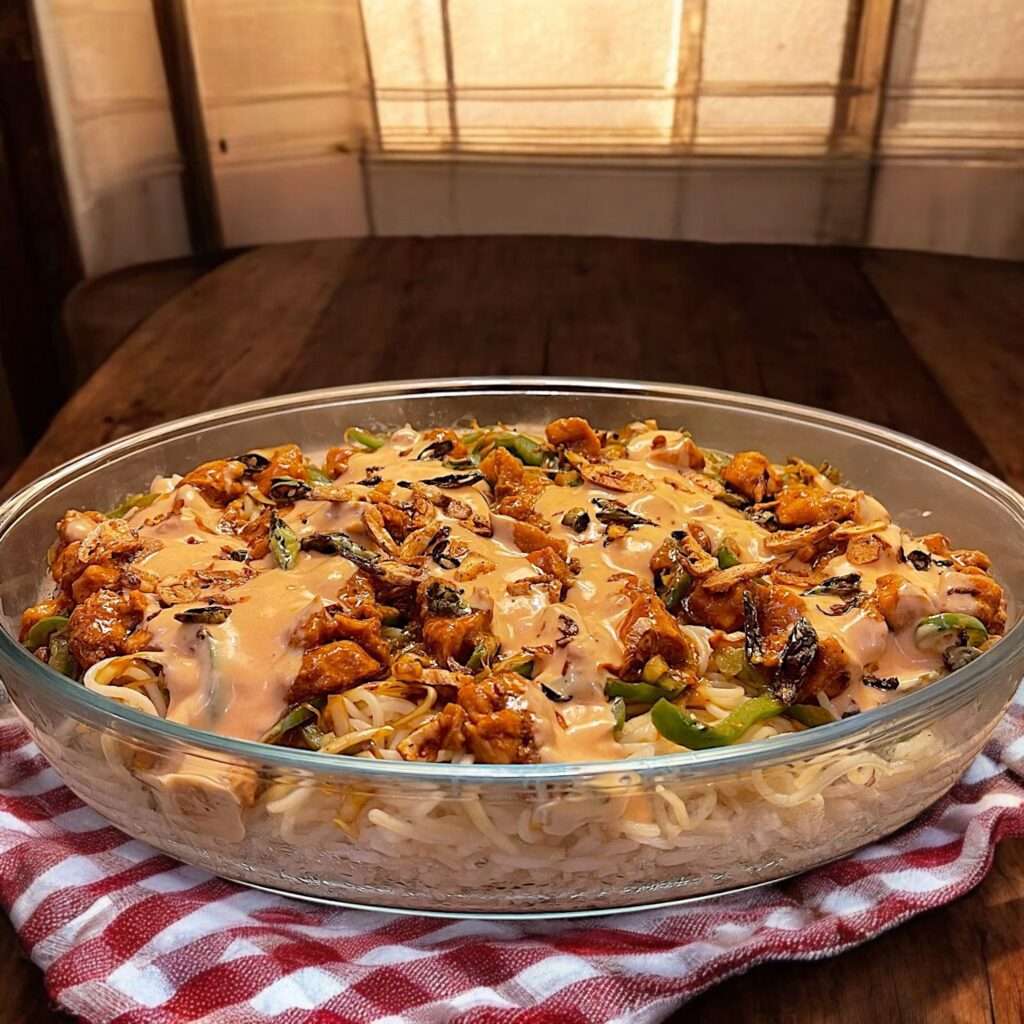
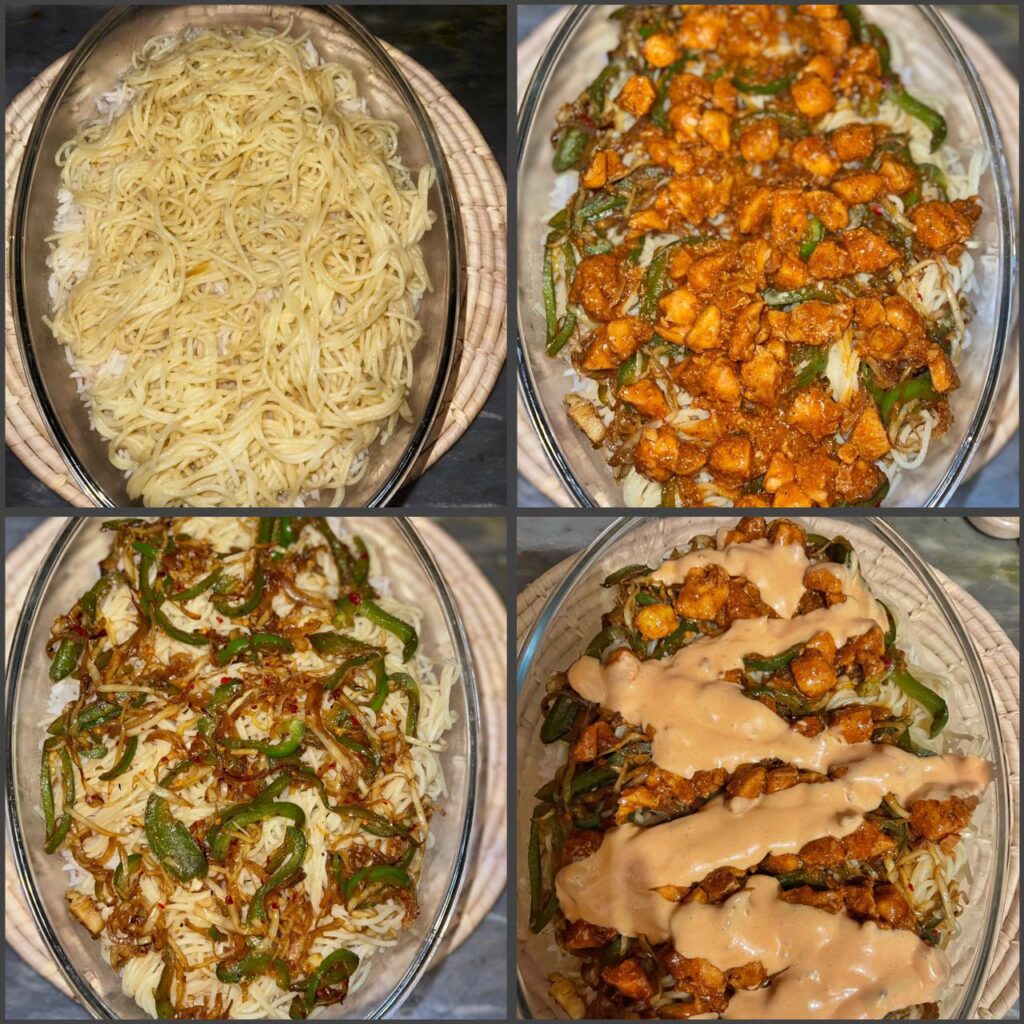
- Assemble Singapore Rice: In a deep dish, start the layering process by placing a base of seasoned rice, followed by the noodles, stir-fried veggies, and the savory chicken gravy. Top off the layers with the prepared sauce, ensuring each layer is evenly distributed. Finish by garnishing the dish with crunch garlic and green chilli topping.
- Enjoy your meal with delicious and mouth-watering Singapore Rice.
Special Instructions For Singapore Rice
When you’re preparing Singaporean Rice, there are specific instructions to follow to ensure it doesn’t lose its authenticity.
- Quality Ingredients: Opt for long-grained basmati rice, seasoned lightly, and egg noodle for perfect stir-fry flavor.
- Layering: The dish consists of layers of rice, noodles, sweet and spicy chicken, a baghaar / tadka of crunchy garlic and green chilies, and a spicy chili mayo drizzle.
- Preparation Ahead of Time to save time: You can prepare each component in advance, if serving at a dinner party. For family meals, hold back on the baghaar and sauce until reheating.
Storage
After you prepare Singapore Rice, you have several storage options to maintain its freshness.
- Refrigeration: Store leftovers in airtight containers in the refrigerator for 3-5 days.
- Freezing: Place the cooled rice in a shallow container and freeze for up to two months. Defrost in the fridge overnight before reheating.
- Reheating: Reheat the stored rice in a pan or microwave until piping hot, adding a splash of water to prevent drying out.
Variations And Substitution
Singapore rice can be changed in many ways to match what you like. Here are some ideas to think about.
- Protein: While this recipe includes chicken, you can substitute it with other proteins such as shrimp, beef or mutton. Vegetarians can opt for paneer.
- Vegetables: The core vegetables I have used in Singaporean rice are cabbage, onion and bell peppers. I was short of carrots, which I love to add in this recipe. But if you like them, feel free to include them in your Singaporean rice. However, you can experiment with other veggies like broccoli, or even corns.
- Rice: While basmati rice are commonly used, you can also try using other long-grain rice varieties or even substituting with brown rice for a healthier option.
- Noodles: The recipe calls for egg noodles or spaghetti, but you can use other types of noodles like rice noodles or even swap them out for additional rice. Choice would be completely yours.
- Spices and Sauces: The key flavors in Singaporean rice come from the chicken gravy which needs to be cooked in Indo-Chinese style, but you can change the texture and taste according to your liking. Coming towards the sauce, the common most option that is pocket friendly too, includes mayo, ketchup, siracha and mustard sauce. But there are plenty of options available in the market like bbq sauce and other spicy sauces, so you can experiment with different sauces to suit your taste.
- Garnishes: The crunchy garlic and green chili garnish is a signature element, but you can also try adding other toppings like fried shallots, or crushed peanuts for extra texture and flavor.
- Preparation: While the traditional method involves layering the components, you can also simply mix all the ingredients together for a more casual presentation. And just top it with the garnish.
Time Saving Tips
To save time on prep, chop all the vegetables ahead of time. Slice the onions, capsicum, and cabbage in advance so they are ready to go when you start cooking.
- Use pre-shredded cabbage instead of chopping it yourself. This is a huge time-saver.
- Cook the rice and boil the noodles in advance. The rice can be made in a rice cooker or Instant Pot ahead of time. The noodles can be boiled and set aside until ready to assemble.
- Marinate the chicken ahead of time. Mix the chicken vinegar, and spices and let it sit in the fridge for 30 minutes or even overnight, before cooking. This will save time when it’s time to stir-fry the chicken.
- Buy pre-peeled garlic cloves instead of peeling them yourself. Or do it one day before making this dish. The pre-peeled garlic is a huge time-saver for making the crispy garlic garnish. You can also use canned garlic paste.
- Prepare the spicy mayo sauce in advance as well. Mix the mayonnaise, ketchup, mustard and siracha sauce ahead of time so you just have to drizzle it over the assembled dish.
Frequently Asked Questions
[sp_easyaccordion id=”3219″]
Singapore Rice | How to Make Singaporean Rice at Home
4
servings30
minutes30
minutes400
kcal1
hourLearn to make delicious Singapore Rice at home. Discover the flavors of this popular dish with step-by-step guide.
Ingredients
1/2 cup basmati rice
1/2 cup egg noodles /spaghetti
1/2 cup oil
500 grams chicken boneless, cube cut
1 teaspoon ginger-garlic paste
6-7 cloves garlic, slices
3-4 green chilli, sliced
1 medium size onions, sliced
1 medium size bell pepper, sliced
1/2 cup cabbage, sliced
3 teaspoon salt (for boiling rice, noodles and cooking process)
1 teaspoon red chilli powder
1 teaspoon coriander powder
2 teaspoon chilli flakes
1 teaspoon garlic powder
2 tablespoon vinegar
4 tablespoon soy sauce
2 tablespoon butter
4 tablespoon mayonnaise
6 tablespoon ketchup (for sauce and chicken)
2 tablespoon siracha sauce
1 tablespoon mustard sauce
Directions
- First, marinate the chicken with salt, chili powder, chili flakes, coriander powder, vinegar, and ginger-garlic paste. Let it sit for at least 30 minutes before cooking. You can also leave it overnight for better flavor.
- Begin by separately boiling rice and noodles in salted water until they are cooked but still al dente. Drain the water, set them aside, and allow them to cool for later assembly.
- Heat oil in a pan over medium flame and sauté sliced garlic and green chilies until they turn beautifully brown. Remove them from the pan.
- In the same pan, cook marinated chicken until it changes color. Add 1/4 cup water, cover the pan, and let the chicken cook for 5-7 minutes. Once cooked, sprinkle black pepper powder and soy sauce. When oil starts separating, add ketchup to the chicken and set the pan aside.
- In a separate pan, heat a bit of oil and stir-fry veggies with soy sauce and chili flakes. Be sure to fry quickly to retain the crunchiness of the vegetables without overcooking.
- In another pan, melt butter and add soy sauce to stir-fry the boiled noodles, ensuring they are well-coated with the sauce for added richness and flavor.
- Next, heat oil in a pan, sauté chopped garlic until fragrant, and then add the cooked rice. Mix well to infuse the rice with garlic flavors. Set the seasoned rice aside for assembly.
- Combine mayo, ketchup, sriracha, mustard sauce, garlic powder, and chili flakes in a bowl. Mix the ingredients thoroughly to create spicy sauce that will elevate the dish.
- In a deep dish, start the layering process by placing a base of seasoned rice, followed by the noodles, stir-fried veggies, and the savory chicken gravy. Top off the layers with the prepared sauce, ensuring each layer is evenly distributed. Finish by garnishing the dish with crunch garlic and green chilli topping.

So good All your recipes are top notch
amazing keep ot up
I wish i was your neighbor your recipes are so good
Wow Amazing