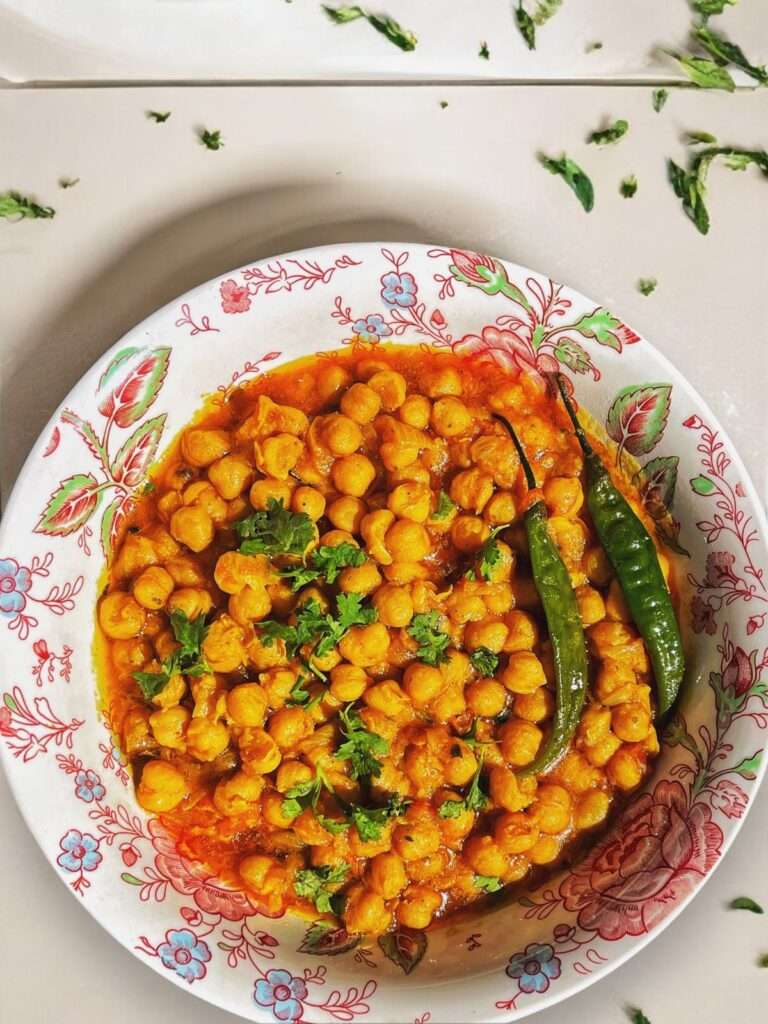
This is what you would call a super tasty spicy Chana Masala that goes great with rice or roti whether its for brunch or the main meal. What really makes this dish shine is the chickpeas in that spicy gravy, honestly once you whip it up you will be hooked and want to make it all the time there are tons of ways to switch it up too so you are gonna love it
About The Recipe
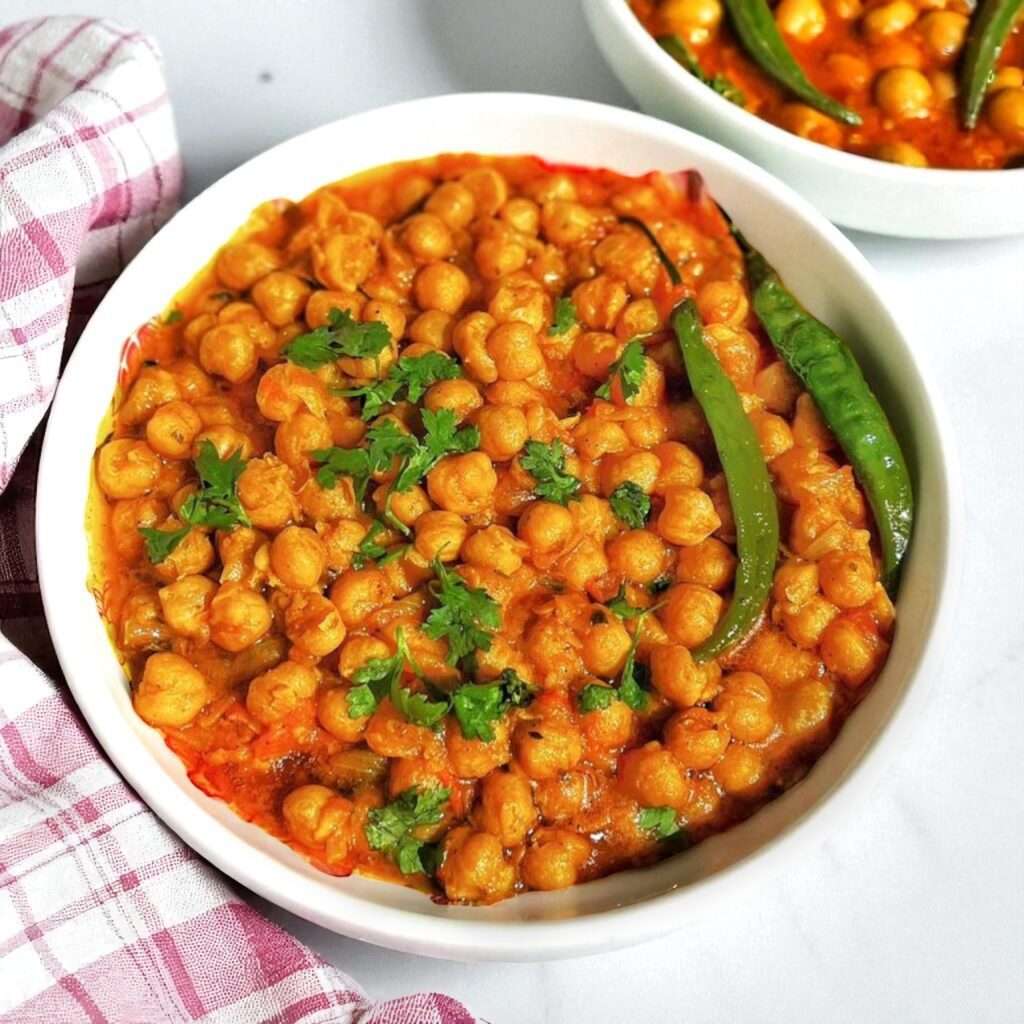
Chana Masala also known as Chanay ka Salan is a popular and flavorful dish that comes from the Asian subcontinent. The history can be traced back to the twin countries, specifically the Pakistan and India. And the chickpeas have been a staple ingredient in the Pakistani diet for centuries.
It’s a curry made with chickpeas in Pakistani (spicy) tomato gravy. You can enjoy it with just plain white rice or even naan or chapati.
Baingan Bharta
Tamatar Chutney
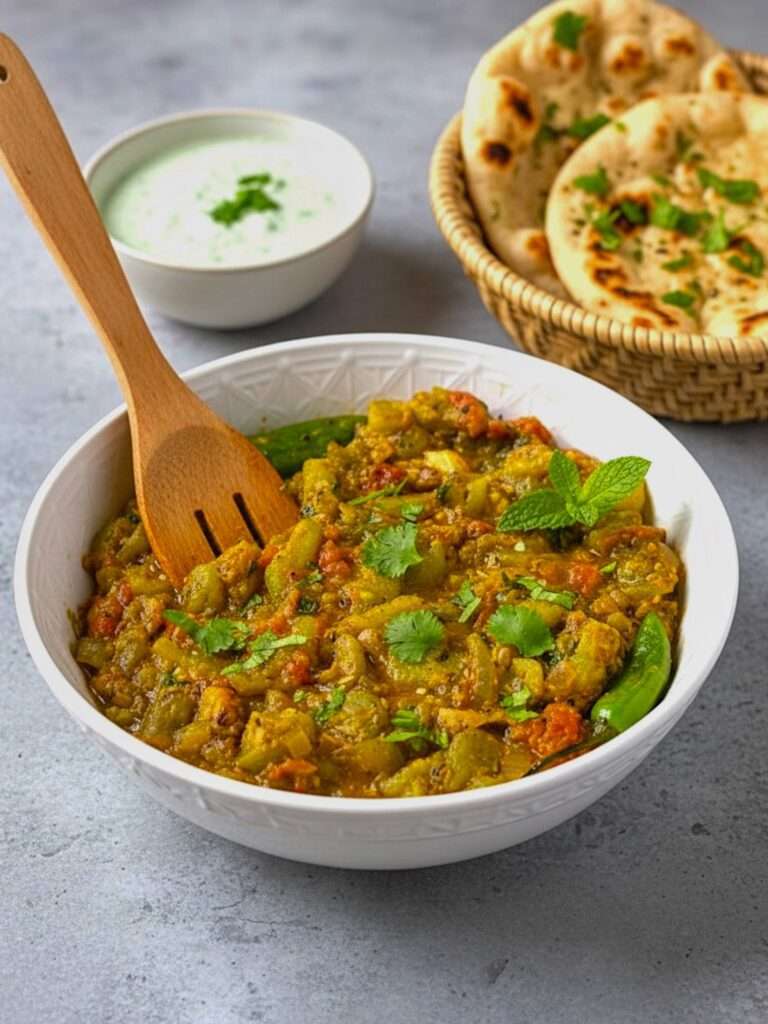
Bhindi Masala
Aloo Shimla
How To Make Chana Masala (Step-By-Step Photo Guide)
Step# 1
Soak chickpeas in water with a pinch of baking soda overnight, ( really important for softening them since they can be tough to boil). After soaking, drain and pressure cook them for about 30 minutes until soft, or boil them until they’re tender if you don’t have a pressure cooker.
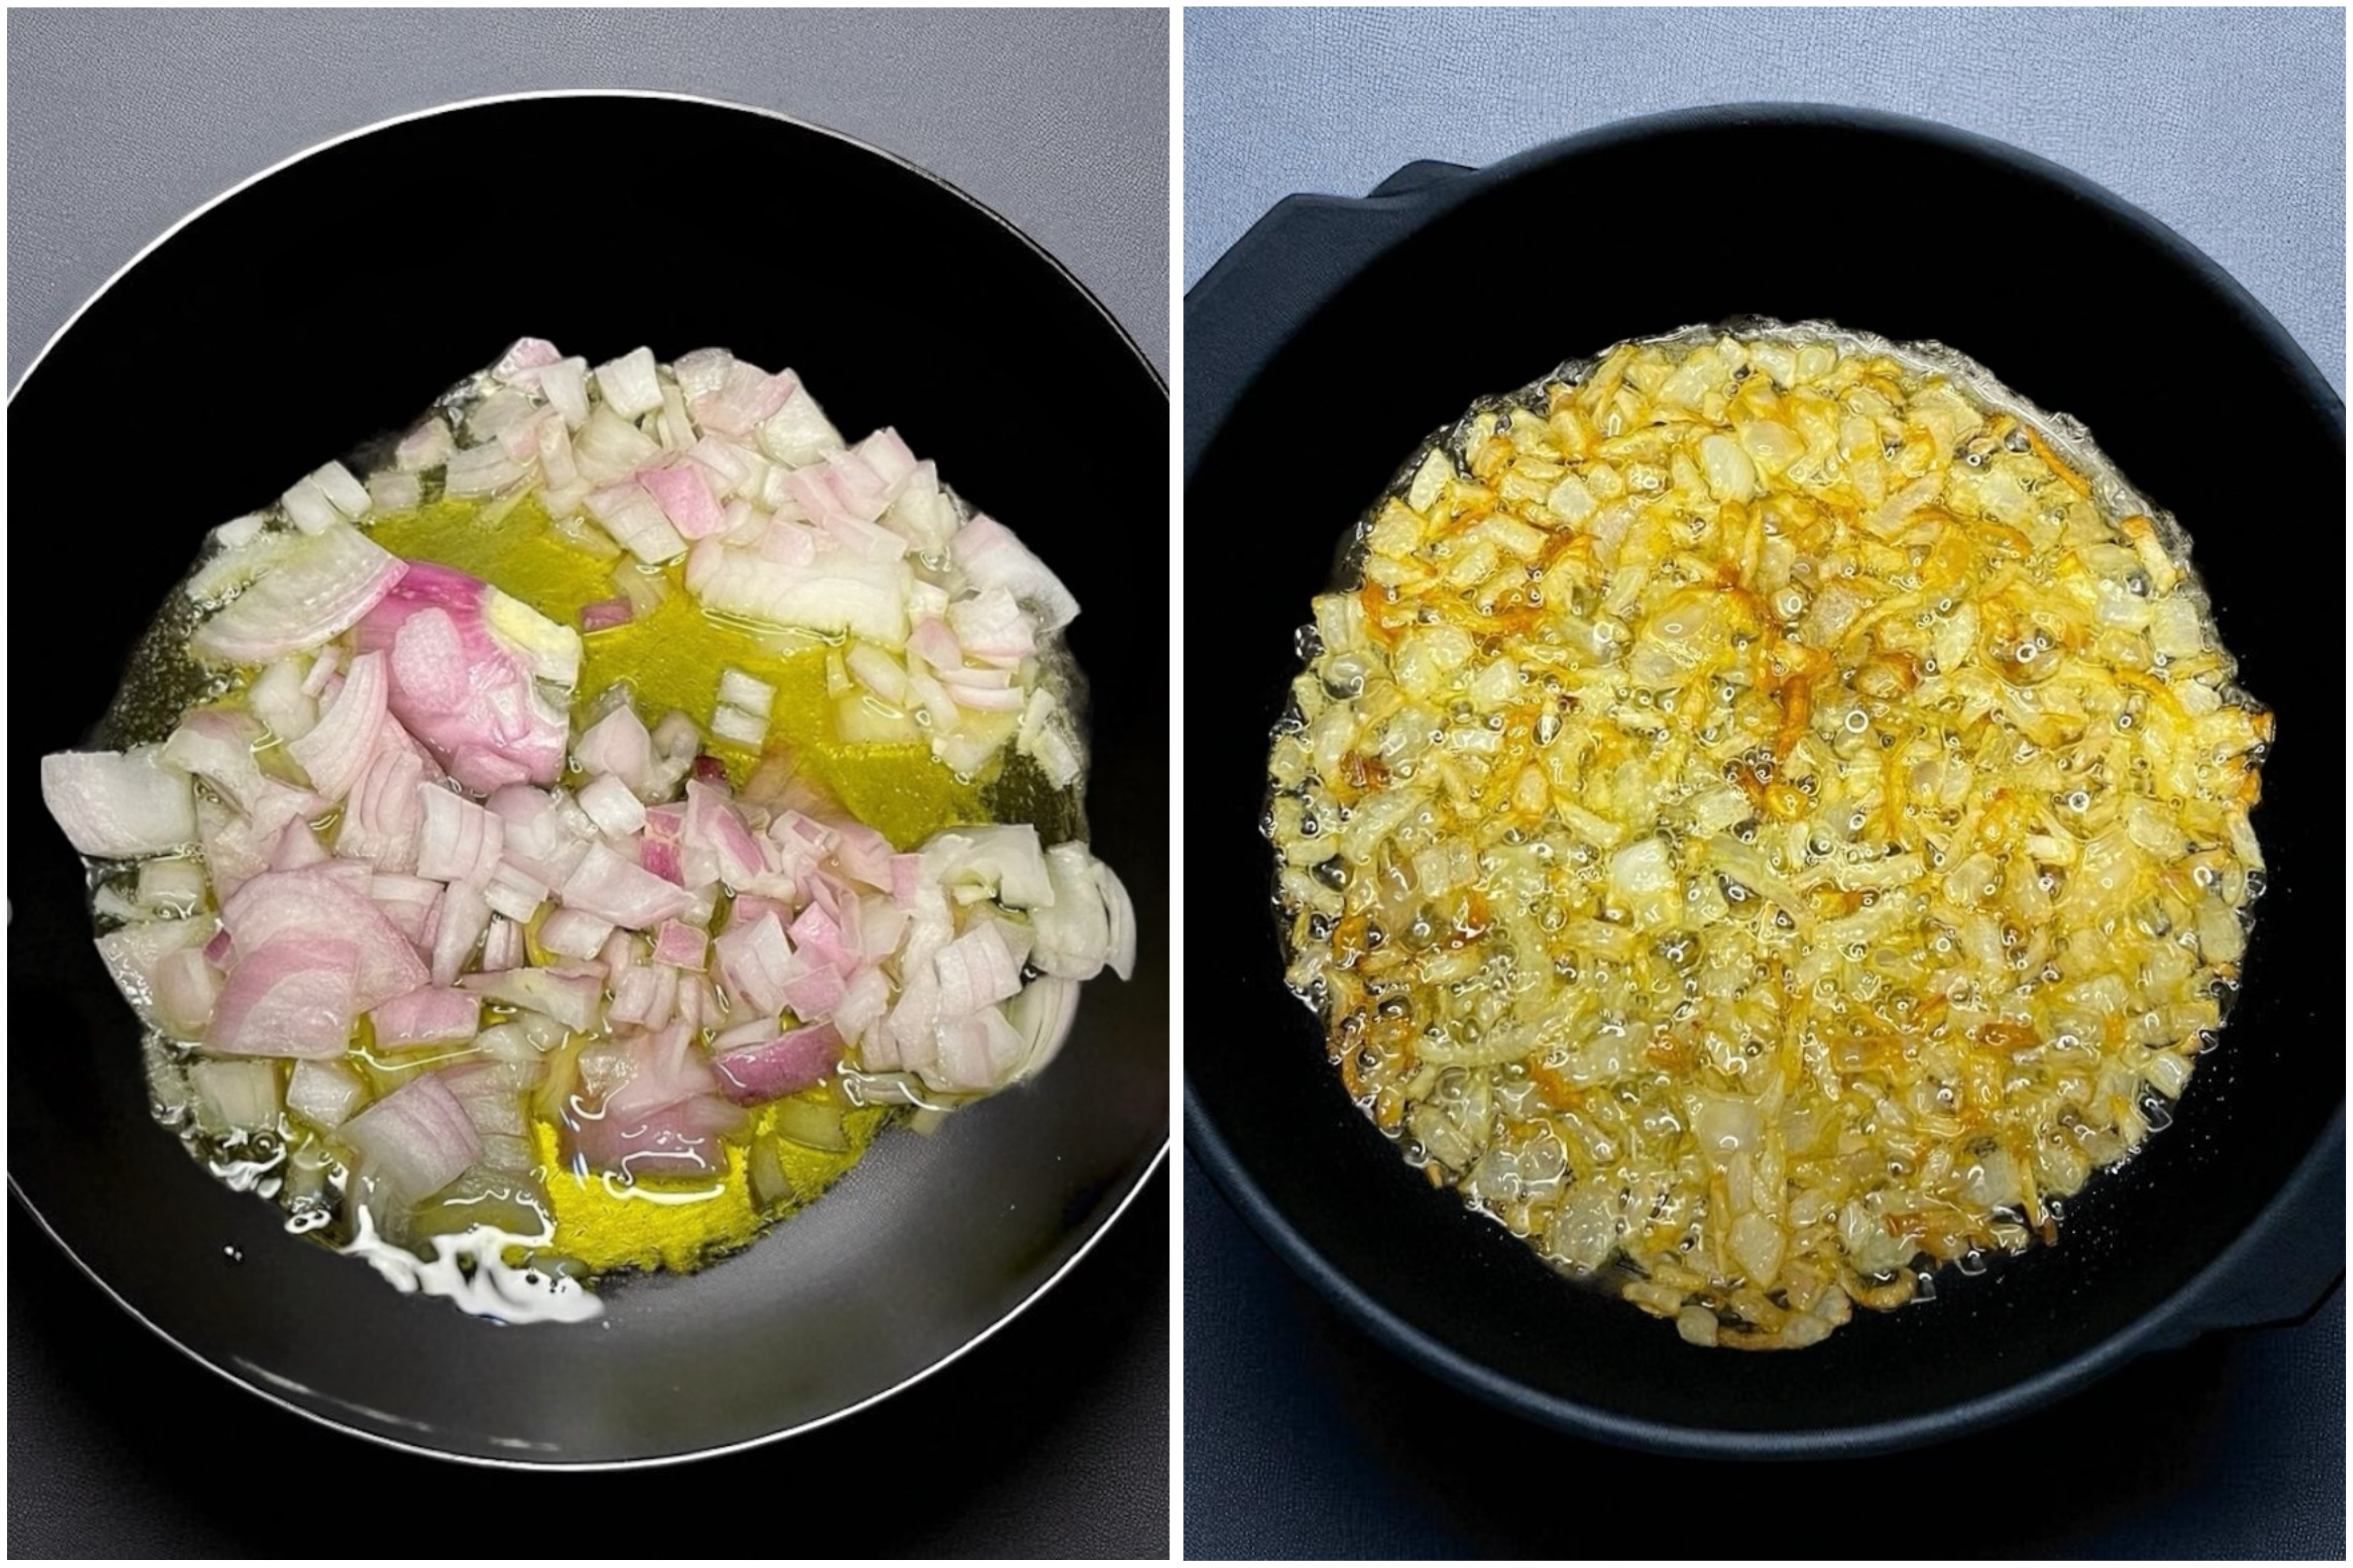
Step# 2
Start by heating some oil in a pan over medium heat. Add chopped onions and cook them until they turn translucent. This should take about 5 minutes. Once the onions change color, add garlic paste and sauté until the raw smell disappears and the paste turns a nice golden brown.
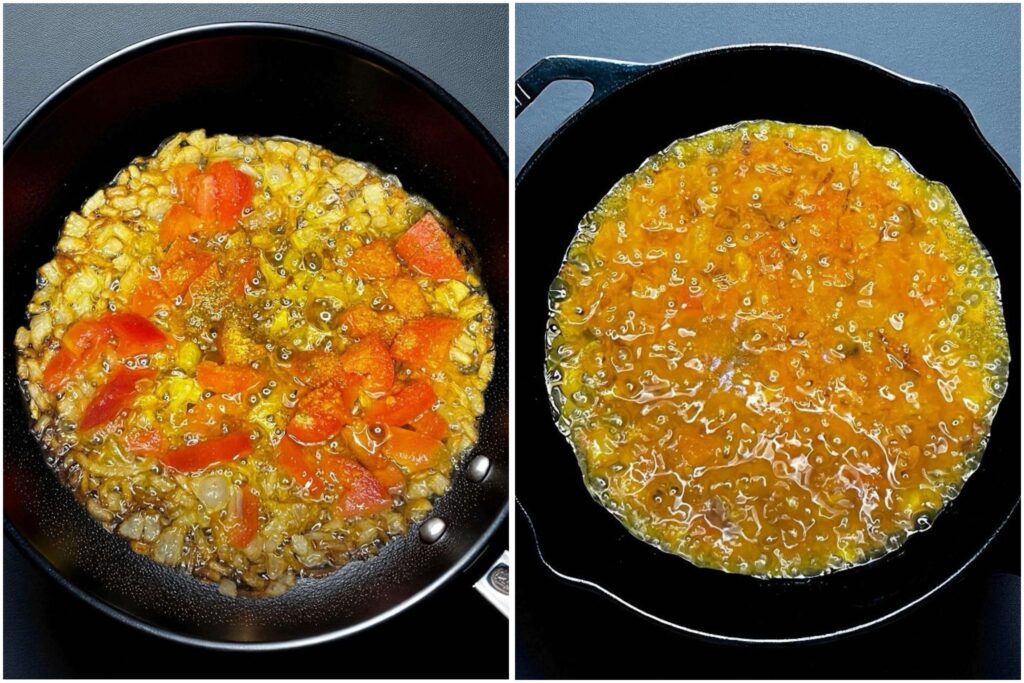
Add chopped tomatoes along with all your dry spices. Keep frying (or bhoon-fy) the masala, adding 2 tablespoons of water whenever it starts sticking to the bottom of the pan, but be careful not to add too much. Continue cooking until the oil separates from the paste, creating a thick jammy mixture.
Once your masala is ready, stir in the chickpeas. Fry them on medium heat for at least 5 minutes, allowing the chickpeas to soak up all the spices. Add green chillies at this stage for some extra fragrance.
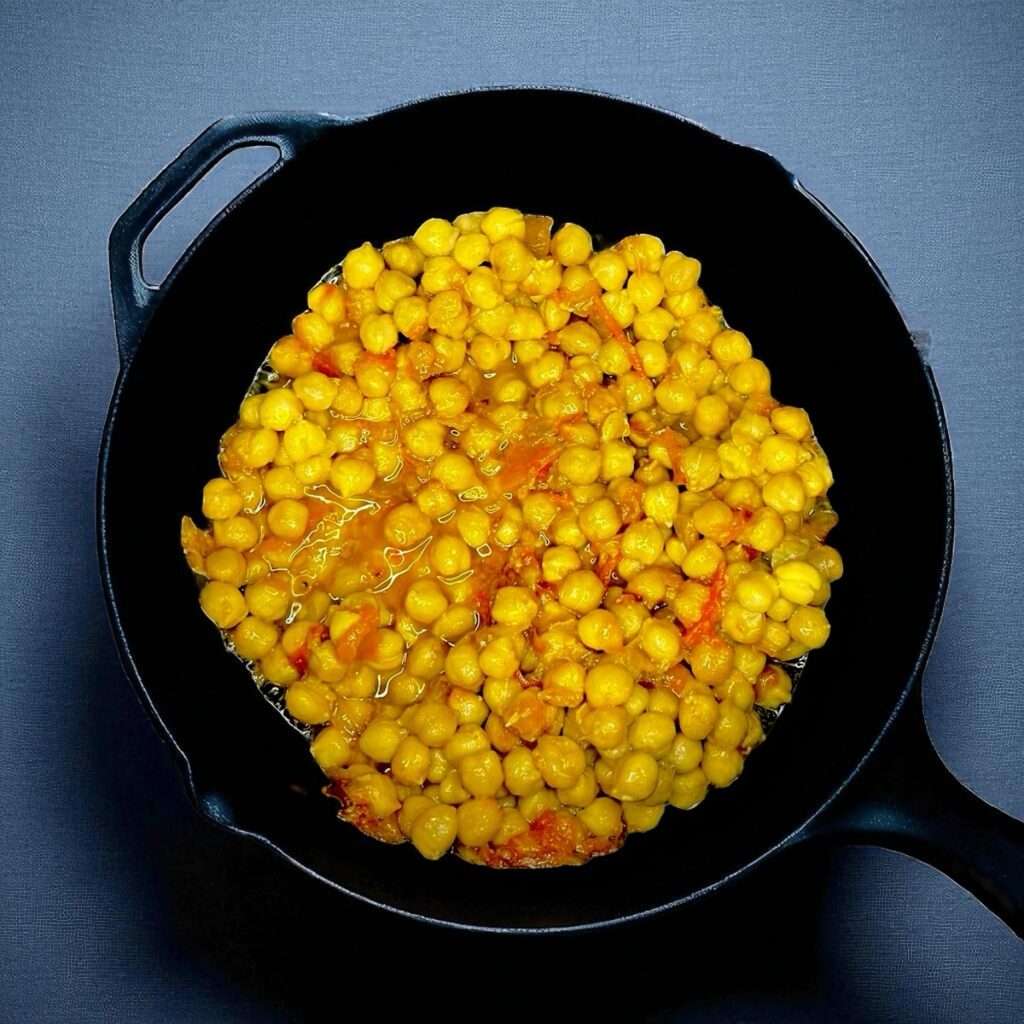
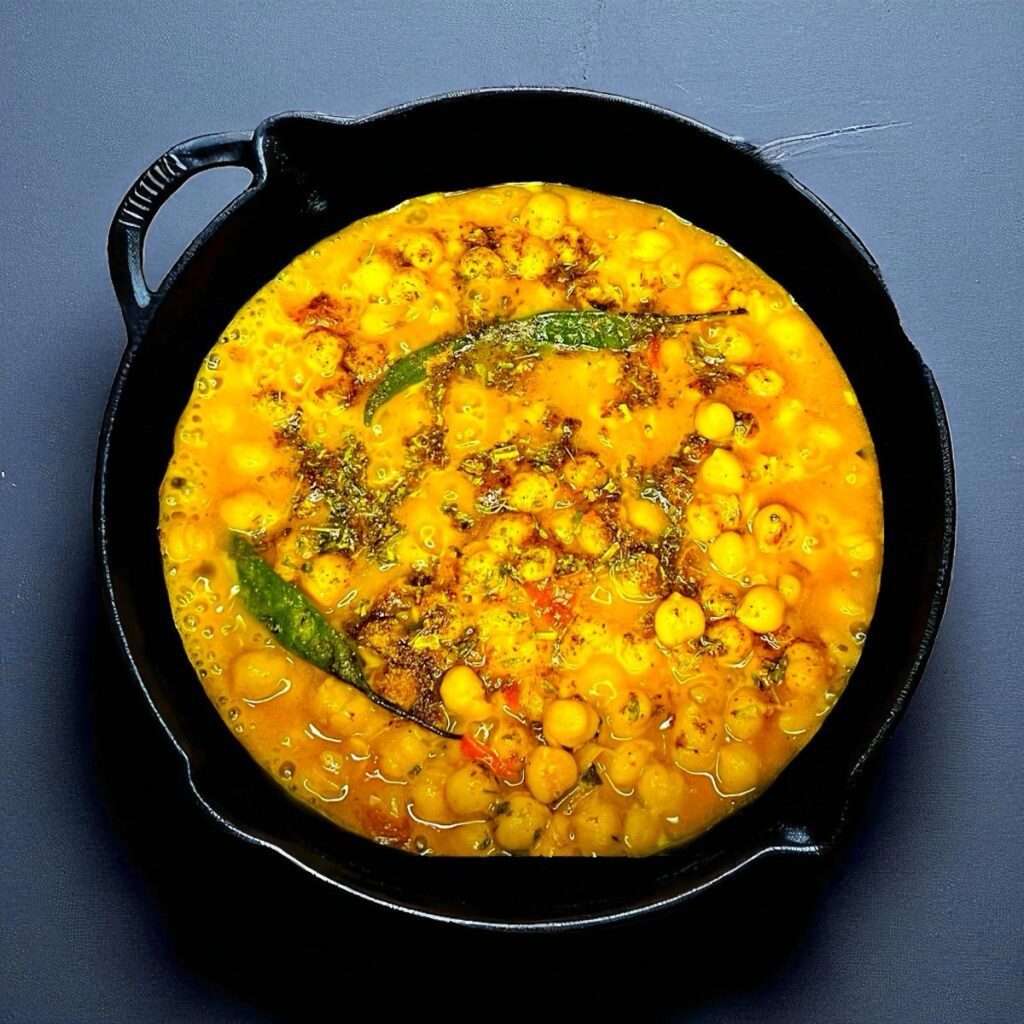
Pour in 2 cups of water and cover the pan with a lid. Let it simmer on low to medium heat until the oil separates again. Finally, sprinkle garam masala and dried fenugreek leaves in the end. Garnish the dish with finely chopped cilantro before serving!

How To Enjoy This Chana Curry
- You can enjoy in so many ways. A classic Pakistani choice is to pair it with some steamed basmati rice. The chickpeas in that rich tomato gravy are just so good with fluffy rice. You can have it with some raita and a fresh salad on the side.
- Another great option is to have it with roti or naan (any bead), which are awesome for scooping up all that gravy.
- If you want something fun then try it with crispy poori or fluffy bhatura, uff they go really well together trust me.
- You can even use this Chana Masala as a filling for wraps or sandwiches. I like it this way because it’s a simple and tasty meal without any fuss. Quick recipes like this are the best! Plus let’s be real, who wants to go through the hassle of making fancy wraps when you already have a filling for them? It’s perfect when you want something easy but still super satisfying. No need to complicate things!
More Dal Recipes
Special Instructions
- For the best results, soak the chickpeas overnight to make them softer and cut down on cooking time. If you’re using canned chickpeas, just rinse them well before adding them to your dish.
- Take your time to sauté the onions until they turn golden brown. Don’t rush this step as this helps bring out their natural sweetness and adds great flavor to your curry.
- Chana Masala can be spicy, but it’s better to start with less spice and add more little by little.
- After adding the chickpeas to the tomato paste, let it all simmer on low heat for about 10 to 12 minutes. This gives enough time for all the flavors to mix and create a delicious dish.
- If the curry is too thick for your liking, add a little water to make it thinner. If it’s too watery, let it simmer without the lid to reduce the excess liquid. Start with 1 cup of water and add more if needed for the perfect consistency.
- If you prefer a thicker consistency, mash a few chickpeas with the back of a spoon to thicken the curry.
Tips And Tricks
- When you add powder spices with tomatoes, cook them properly until oil separates. The more you cook the better the gravy forms. Taste of any curry depends on the foundation of a gravy/ masala. So cook your spices well!
- If you can, grind your spices from whole seeds or get freshly ground spice blends. This makes your dish taste a lot better and stronger.
- Let it simmer on low heat for about 10 to 12 minutes or even longer. This extra cooking time helps all the flavors mix together, making taste richer and better!
- Just before serving, add a small amount of ghee (butter) in the end. Ghee gives a nice rich and buttery flavor that makes the dish even better!
- Sprinkle both the garam masala and dried fenugreek leaves sparingly towards end as their flavors can be strong if cooked and used excessively.
Making The Most Of Your Leftovers
- If you have leftover Chana Curry, you can easily make Chana Chat by mixing in some crunchy papdi, along with chopped veggies (onions, tomatoes, cilantro, green chillies and cabbage). Squeeze a bit of lemon juice on top, then add some tamarind chutney, yogurt, and a sprinkle of chaat masala. Trust me it turns out sooo good and it’s a simple and fun way to enjoy the leftover curry!
- This salad is one of my favorites just like the chaat! It’s super easy to make. You can whip up a simple salad by adding chopped bell peppers, cherry tomatoes, and cucumbers to your Chana Curry. Drizzle on some lemon juice, olive oil, a seasoning of your choice and you’ve got a great salad recipe! It’s a delicious and healthy way to enjoy your leftovers.
Tips To Freeze Chana Masala For Later Use
- Allow the Curry to cool completely before freezing. This will help prevent the formation of ice crystals and maintain the texture of the dish.
- Divide the Channa Curry into portion-sized servings based on your needs. This way you can defrost only the amount you require for each meal.
- Use freezer-safe containers or resealable freezer bags to store the curry. Make sure they are airtight and can withstand freezer temperatures.
- It can be safely stored in the freezer for up to 3 months.
Chana Masala In An Instant Pot
To make Chana Masala in an Instant Pot, start by selecting the sauté function and heating oil. Sauté onions until golden, then add garlic paste and spices. Stir in chopped tomatoes/ puree along with all spices and cook for a couple of minutes. Add soaked or canned chickpeas and water, giving it a good stir. Close the Instant Pot, set the timer for 8 minutes, and allow natural pressure release for 10 minutes, followed by a quick release. Adjust the gravy consistency using the sauté function if desired. Garnish with cilantro, and serve hot with rice or naan bread.
Frequently Asked Questions
Can I make Chana Masala with canned chickpeas?
Yes, for sure! You can use canned chickpeas to make it. They’re a great option because they’re already cooked and super easy to use.
Why add baking soda to Chana Masala?
It helps soften the chickpeas and cut down cooking time. It makes the water more alkaline, which helps break down the fibers in the chickpeas, making them tender. This is especially helpful if you’re using dried chickpeas that you didn’t soak overnight. Just be careful not to use too much baking soda, as it can change the taste and texture of the dish. A good rule is to use a ratio of 1:1 add 1 teaspoon of baking soda for every cup of chickpeas.
Can I use frozen chickpeas in Chana Masala?
Yes, you can use frozen chickpeas in Chana Masala! While canned chickpeas are easier, frozen ones work just as well. Before using them, make sure to thaw them completely.
How to make Chana Masala Pakistani Style | Chana Masala Recipe
4
servings15
minutes25
minutes300
kcal40
minutesA delicious homemade recipe of Chana Masala restaurant style, made with tender chickpeas in tomato gravy, with basic ingredients.
Ingredients
1 cup chickpeas (boiled)
1/2 cup oil
1 medium size onion, finely chopped
2 medium size tomatoes, chopped
2-4 (whole) green chillies
1/2 tsp garlic paste
1 tsp salt
1 tsp coriander powder
1 tsp cumin powder
1 tsp turmeric powder
1/2 teaspoon garam masala
1 tsp red chili powder
1 tsp dried fenugreek leaves
1/4 cup or (handful) Fresh coriander leaves, chopped (for garnish)
Directions
- Drain and rinse the soaked chickpeas. Cook them in a pressure cooker or a large pot with fresh water until they become tender (around 20-25 minutes in a pressure cooker or 1-1.5 hours in a pot). Set aside.
- In a pan, heat oil over medium flame. Add finely chopped onion and cook until it becomes translucent.
- Add garlic paste. Sauté for another minute until fragrant.
- Add chopped tomatoes and all dry spices : coriander powder, cumin powder, turmeric powder, red chili powder and salt. Stir well to combine the spices with the mixture.
- Cook the tomato-spice mixture for 5-7 minutes until the tomatoes become soft and the spices are well incorporated.
- Add cooked chickpeas to the pan along with a little water (around 1/2 cup) to adjust the consistency of the curry. Mix everything well. Cover the pan and cook on low heat for about 10-12 minutes to allow the flavors to meld together.
- Taste and adjust the seasoning if needed. If you prefer a thicker consistency, mash a few chickpeas with the back of a spoon to thicken the curry.
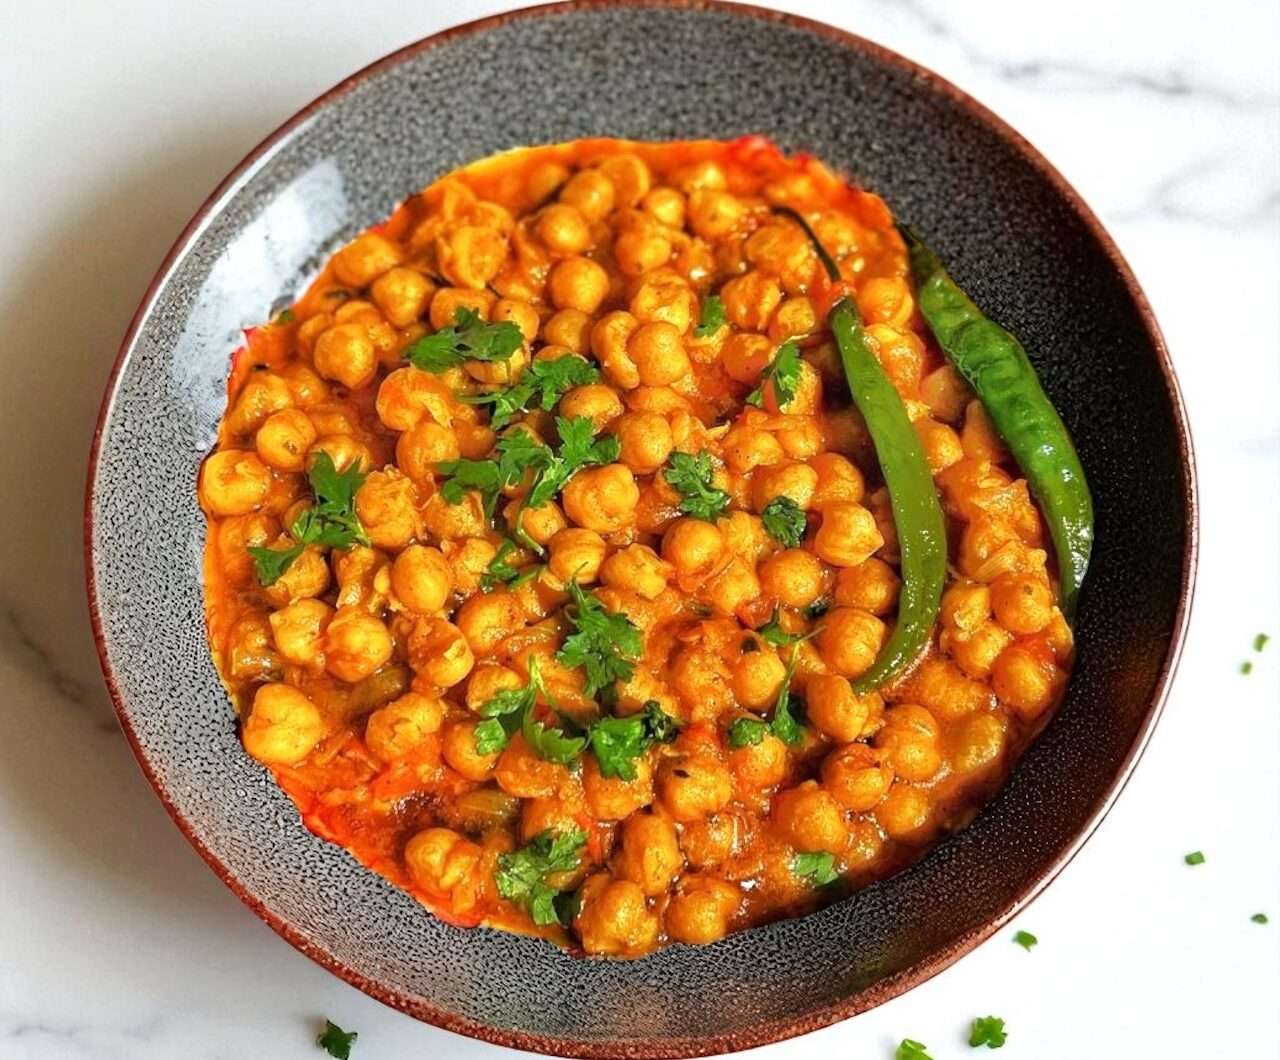
- Once the curry is ready, garnish with freshly chopped coriander leaves.
- Serve the Chana Masala hot with steamed rice, naan, or any bread of your choice. Enjoy your delicious homemade Chana Curry!
Notes
- Pre-soak chickpeas before making a Chana Masala, will help reduce cooking time.
- If you prefer a thicker consistency, mash a few chickpeas with the back of a spoon to thicken the curry.
- If the curry is too thick for your liking, add a little water to make it thinner. If it’s too watery, let it simmer without the lid to reduce the excess liquid. Start with 1 cup of water and add more if needed for the perfect consistency.
Made chanay masala by following your recipe and it was just so good. Each chana has its own special taste. My kids loved it too! Your recipes are truly the most amazing and easy ones.
Oh I’m glad you and kids liked it! 🙂
Your recipe is just the best. I made it for my family for brunch yesterday nd they’ll loved it and I got so many compliments that it is just the right amount of everything in it. Thickening by spoon was the key.
Thank you Surriya!
Wow Yummy. I’ll definitely try it
Looks yummy
V nice and must be tried
Cant wait to try the recipe on weekend